Installing and Running umurmur (for Mumble)
Aug 20, 2023
Instead of relying on Discord's "dedicated" and "private" servers, we can run our own open-source private VoIP server once we have a VPS running.
This is, in fact, quite easy to achieve using a lightweight server component designed for Mumble, umurmur.
For this guide, we will be using an OpenBSD server, but feel free to follow similar steps on Linux.
First, we need to install umurmur, since it is not included in the base install.
A binary package is provided, which can be installed using the package manager.
It is a good idea to edit the configuration file now to define a password (for users) and an admin password for the server. 16-character random passwords can be generated using the one-liner below.
| &&
We can now look for the password and the admin_password directives in the /etc/umurmur/umurmur.con file, and insert our generated passwords.
password=;
admin_password=;
Feel free to make any other parameter changes that you see fit, or to add/remove/rename channels.
After saving the file, we can enable and start the umurmurd service to run the server.
We have a running umurmur server!
We can now connect to it from Mumble clients and start voice chatting.
First, we need to install a Mumble client on a client machine.
This should be available on most Linux and BSD systems through the package management system.
On OpenBSD
On Linux (Red Hat/Fedora)
On Linux (Debian/Ubuntu)
On Linux (Void)
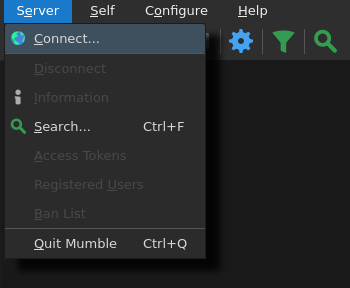
Upon running the client for the first time, Mumble will go through the initial setup for sound settings. Once the setup is complete, we open the server connections interface.

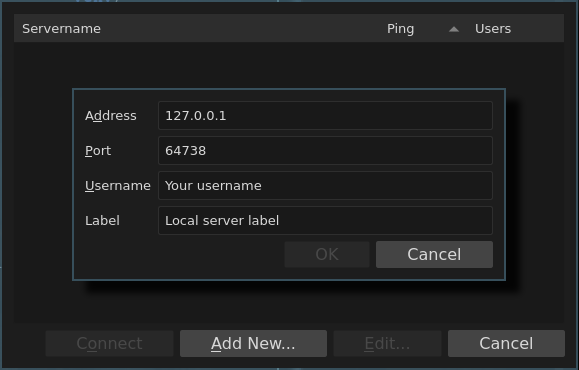
Then, we add a new server, and fill in the public IP address of our server.
The default port is 64738, which is the port our server uses.
The username and the label can be set to anything.

After adding the server, we click the Connect button.
We are now connected to the server, and we can start chatting!